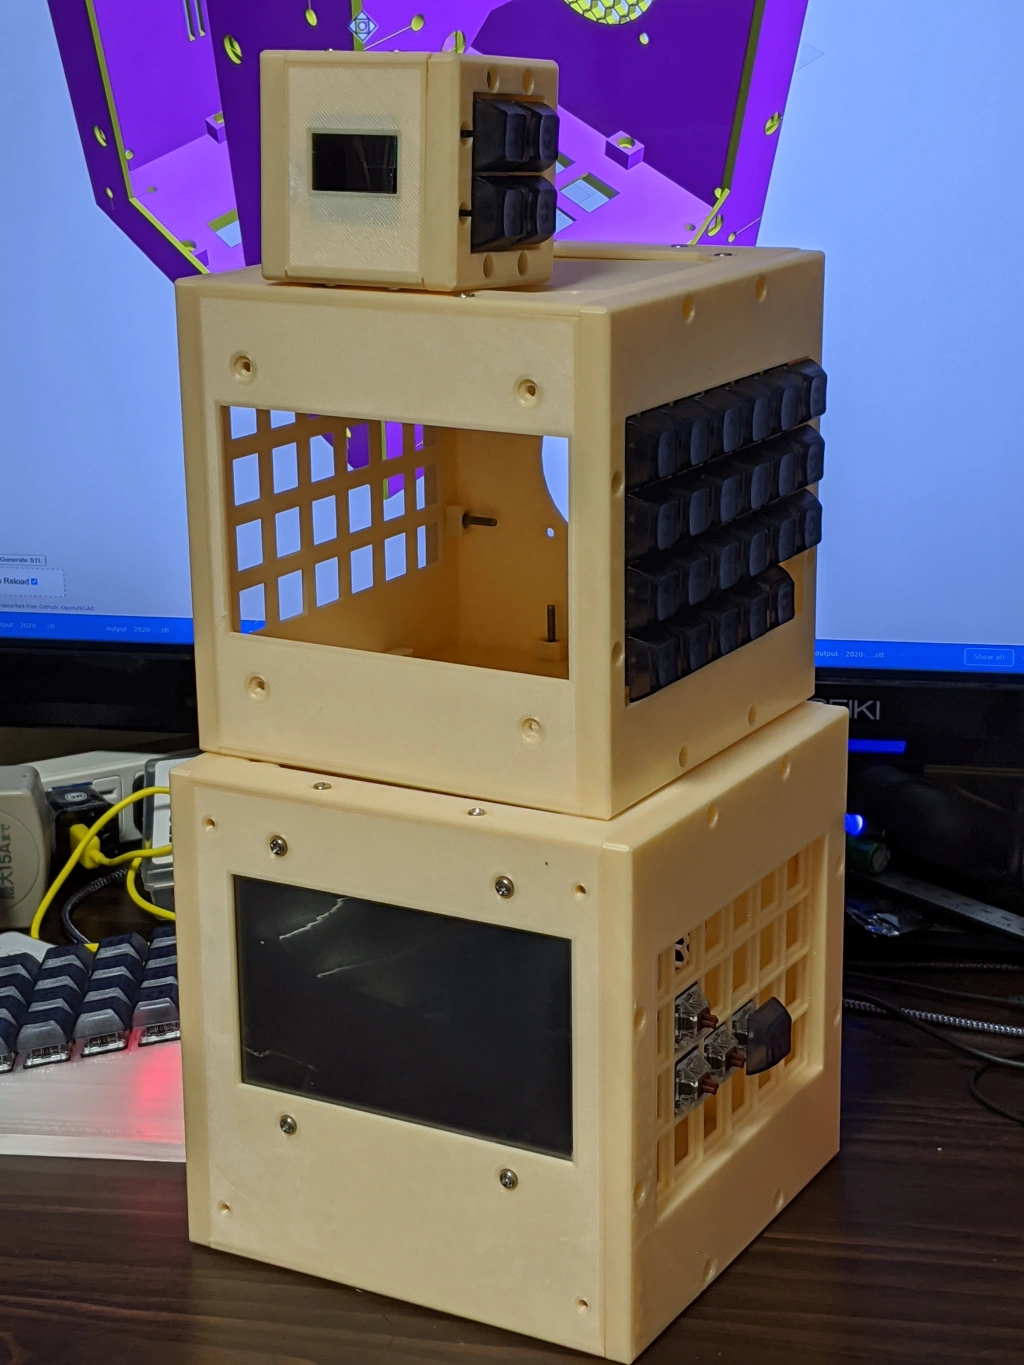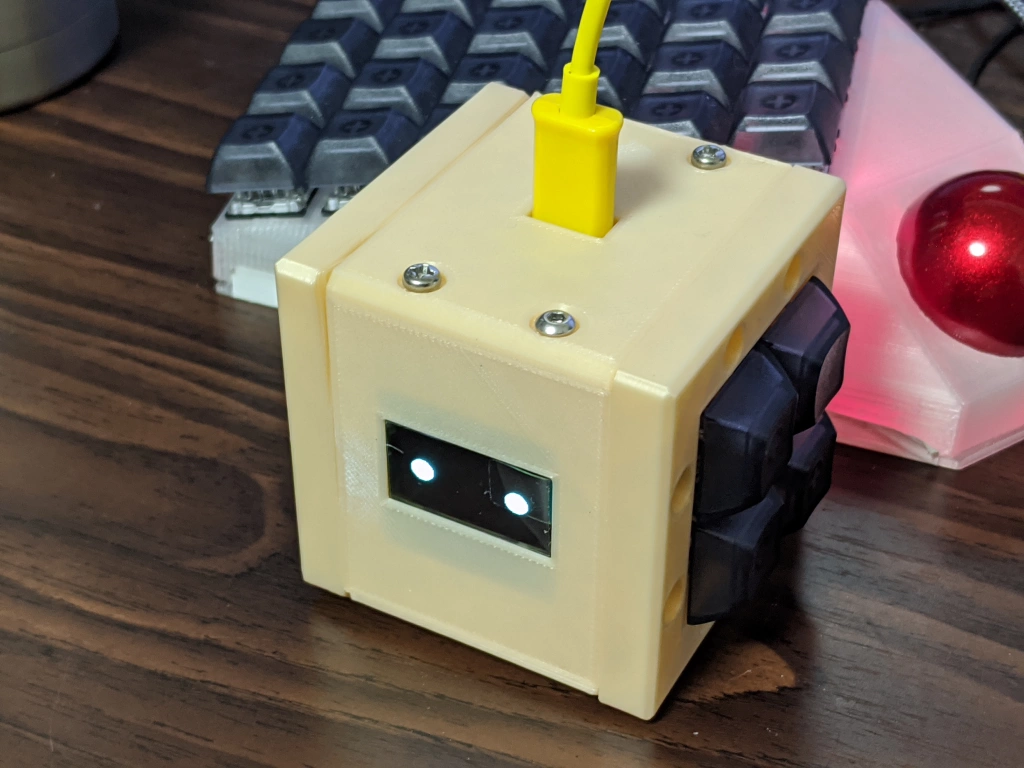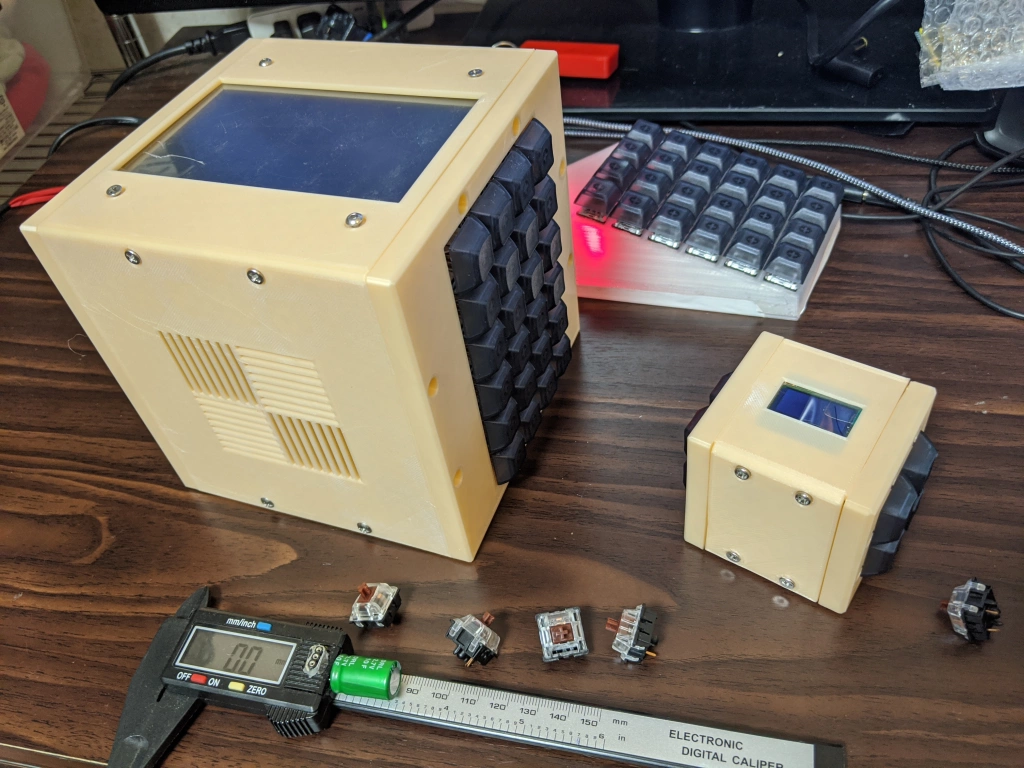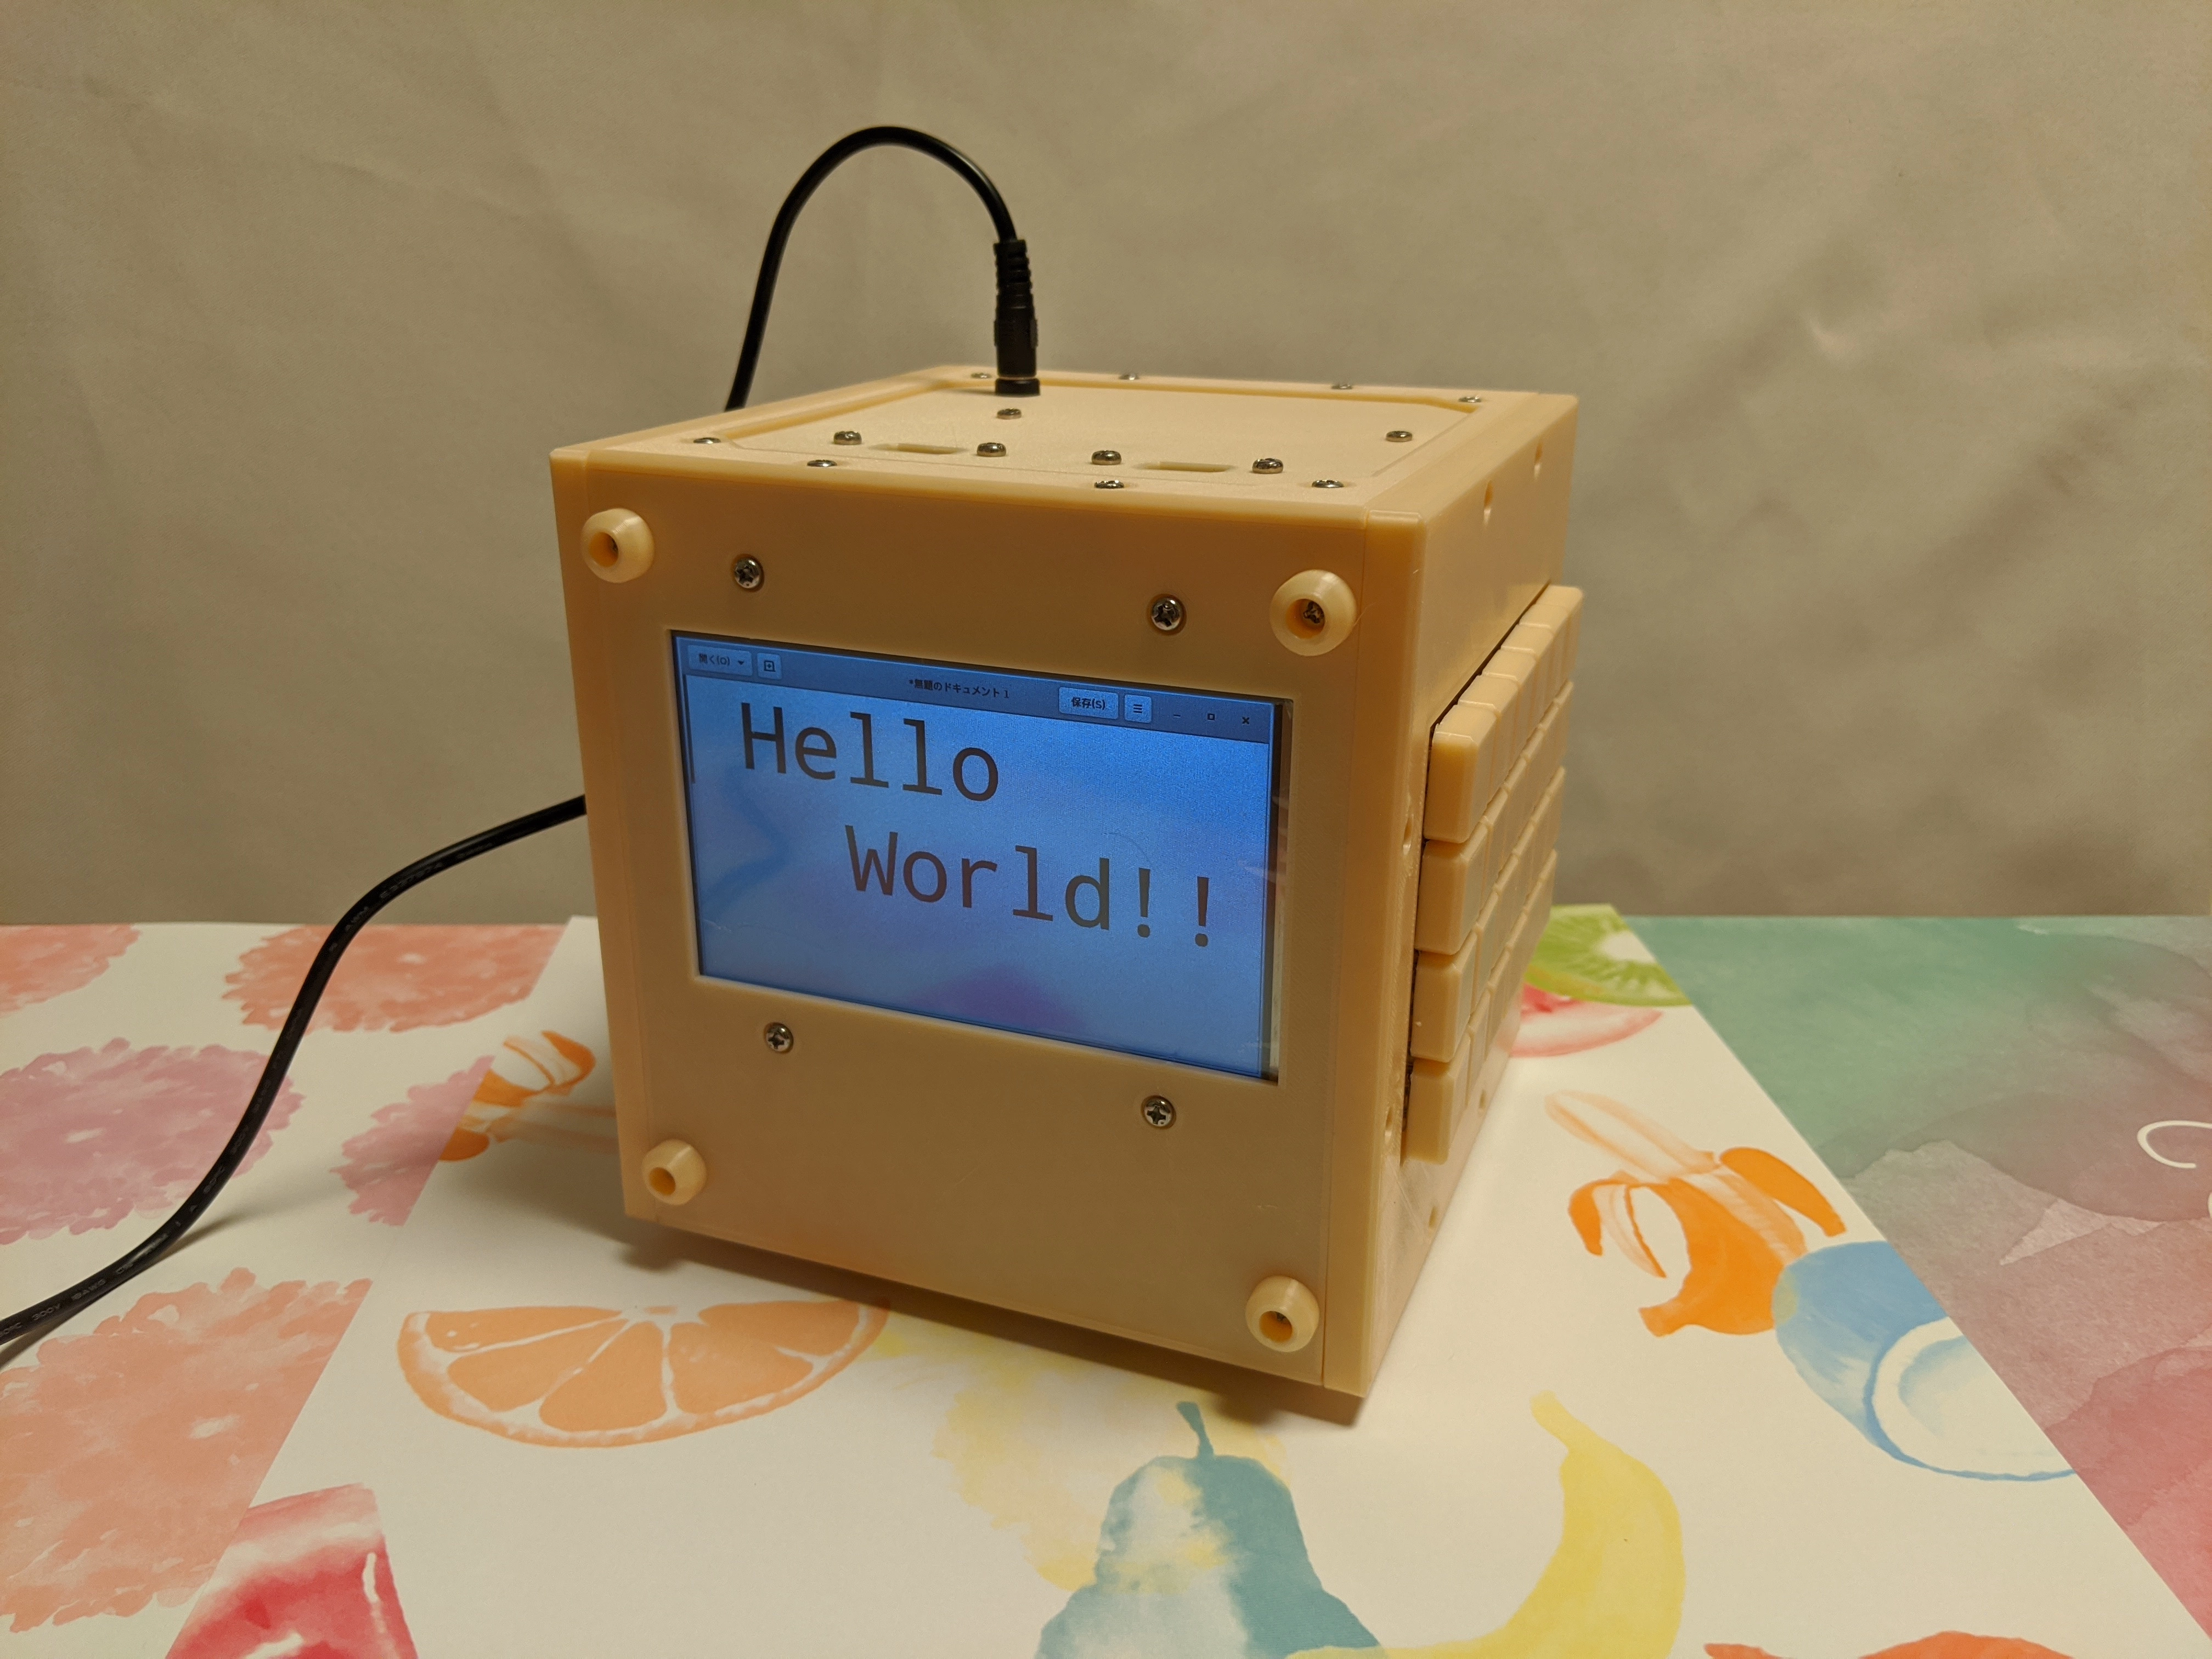
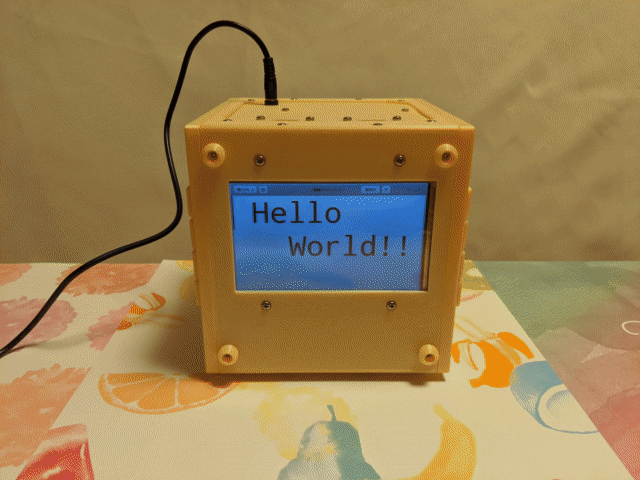
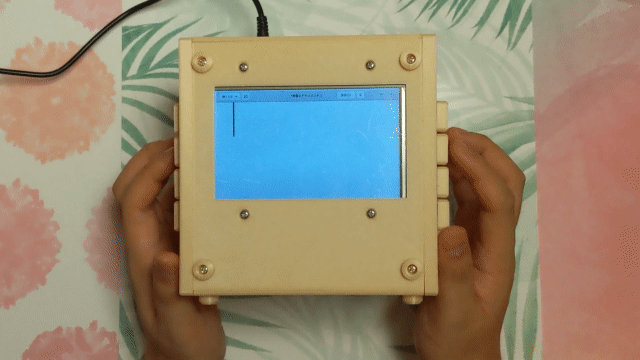
キューブ型のPCを作った。
スペック
- サイズ: 縦横高さすべて15cm
- 画面: 5インチ液晶
- メインボード: RaspberryPi 4(8GB版)
- キーボード: 48キー (4行6列を左右に配置)
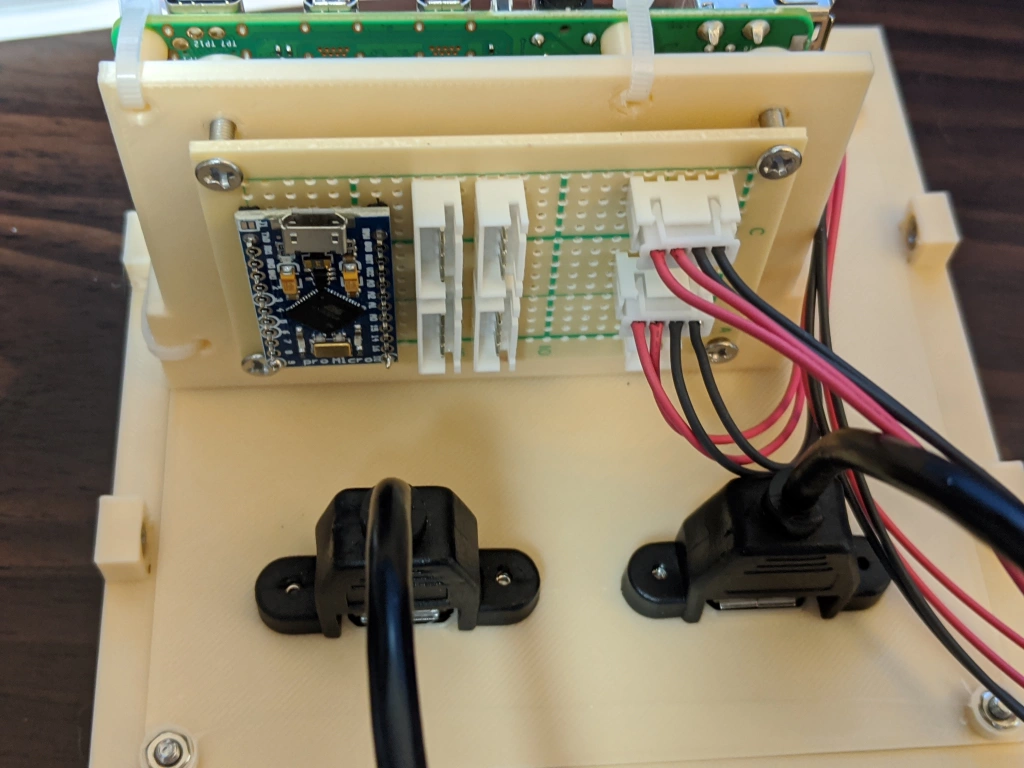
- キーボードコントローラー: ProMicro
- USB: 2個
- 冷却: 6cm fan
- 電源: 5V 4A ACアダプタ
Spec
- Size: HxDxW 15cm x 15cm x 15cm
- Display: 5inch lcd
- Mainboard: RaspberryPi 4(8GB version)
- Keyboard: 48Keys (4rows 6columns 2plane)
- USB: 2 ports
- Cooling: 6cm fan
- Power: 5V 4A AC adapter
形
キューブ型をしたPCというのは、G4 CubeやNeXTcubeからはじまり、 自作PC界隈でもメジャーな形状だ。 しかし、私はここに物申したい。

(NXT Cube Wikipediaより引用)
ディスプレイやキーボードが外部に出てると、 PCシステム全体を見るとぜんぜんキューブ型をしてないじゃないか。 そこで、今回はディスプレイもキーボードも含めてキューブ型をしたPCを作る事にした。
Form factor
There are lots of “cube” style PC like G4 Cube or NeXTcube. But these PC requires external display or keyboards. As a system it’s not cube anymore I think. I want to create true cube pc include internal display and keyboard.
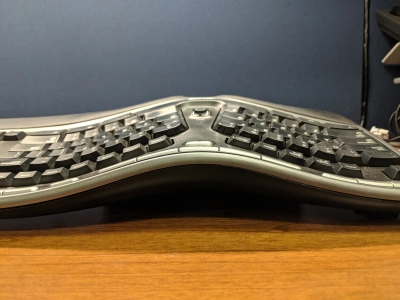
キーボード
手を机の上に力を入れずに自然に置いた場合、 手は下を向かない場合が多い。
そう考えるとキーボードは平面ではなく、 角度がついている方が手首にやさしい。
例えば、Microsoft ergonomic keyboardはハの字型に角度がついているし、 私の今使っている自作キーボードも左右対照に角度をつけている。
(Microsoft ergonomic keyboards Wikipediaより引用)
この角度はどのぐらいが妥当なのだろうか?
極端な例としてSafeTypeの、 垂直なキーボードがある。 これが意外と悪くないと聞く。
今回はこれを採用して、 レップリを縦にした形にした。
Keyboard
When I use an ordinary flat keyboard, I feel my wrist is twisted and sometimes feel pain.
Some ergonomic keyboards like Microsoft ergonomic keyboards are tilted for a more natural way. SafeType is an extreme keyboard. It’s vertical.
For this project, I decided to put “let’s split” style keyboard to side plane.
造形
ケースは、Web上で使えるOpenJSCadを使って設計した。 印刷はEnder3という3Dプリンタを使って行った。
全体を一気に印刷すると時間がかかるうえ、失敗した時のリカバリが難しいと考え、 6面体の各面を別々に印刷して、M3のボルトとナットで固定している。
各面は3mmの厚さがあるが、左右はキーキャップを保護するために8.5mmの厚さがある。 外形を150mmにするために、角に出てない面はその分小さくしてある。
一旦、一辺60mmのものを結合をテストするために作り、 キーボードのサイズにあわせた一辺140mmのものを作ったが、内部で部品が干渉する事がわかり、 最終的に一辺150mmで作りなおした。
150mm四方のものは1パネルあたり4-6時間が印刷にかかっている。
Modeling and print
I use OpenJSCad for CAD and Ender3 3D printer for printing.
I print each panel instead of print everything at once for both print time and try-and-error. Each panel is connected by M3 bolt and nut.
Each panel has 3mm thick, but the side panel has 8.5mm to protect keycap. External size is 150mm, some panel is smaller to fit that external size.
I create a 60mm test model first then print 140mm size. 140mm comes from keyboard size. Unfortunately, internal PCB need more size, I re-printed with 150mm size.
Each panel takes 4-6 hours for print.
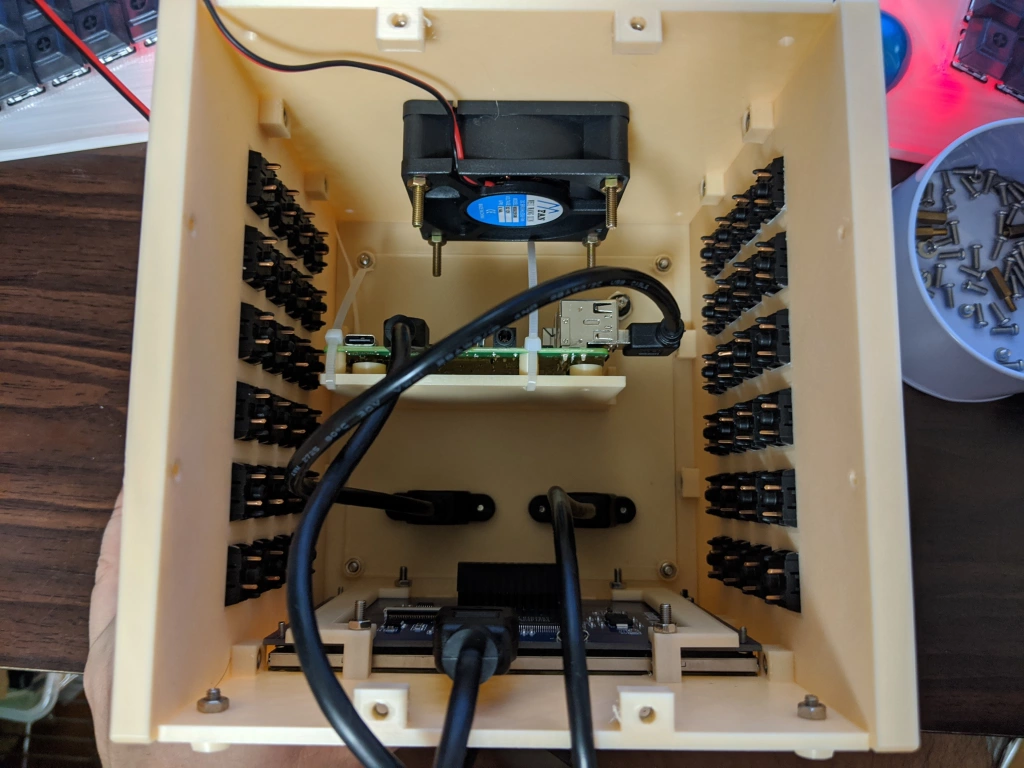
配線
電源として、5VのACアダプタを使っている。 これの5Vのラインを、
- RaspberryPi 4
- 画面
- ファン
につないでいる。
ファンは12V用を5Vで動かしている。 その分静か。
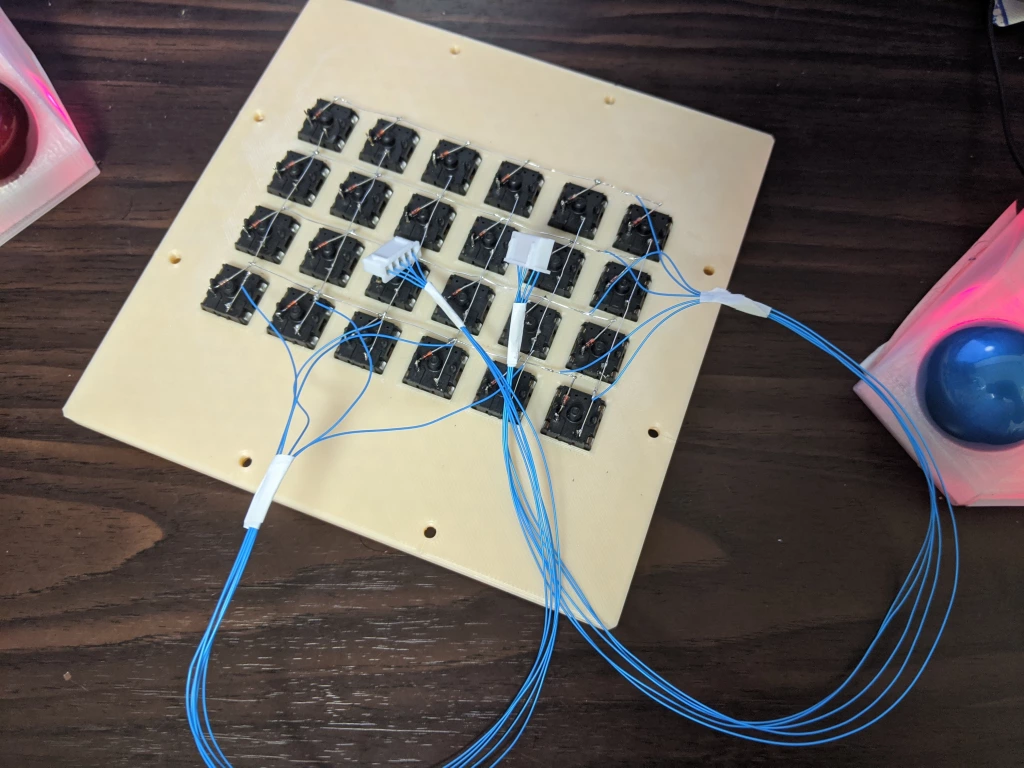
キーボードとしては、左右に独立したマトリクスを持つ形にしている。 それぞれ4行6桁なので、20本の線がProMicroにつながっている。
今回は倍マトリクスを採用したので、 左右のダイオードの向きが逆になっている。 QMKファームウエアにパッチをあてたものが搭載されている。
Schematics
For the power source, I use an AC adapter that provides 5V DC. I connect this 5V line to these devices:
- RaspberryPi 4
- Display
- Fan
The fan is designed for 12V, but I run it as 5V.
For keyboard, I have separate matrixes for both plates. Each plate has 6cols and 4rows. These 20 wires are connected to pro micro.
I decided to use the duplex matrix. Each plate has the same matrix but the direction of diodes is opposite. QMK firmware has a special patch to support the duplex matrix.
消費電力と発熱
アイドル時に6W、高負荷時8W、画面消灯時に4Wぐらい消費してる。
単に起動してるだけだとCPU温度は40℃ぐらい。 高負荷をかけると60℃ぐらいになる。
ファンを消すと70℃を越すほど熱くなるので、 ファンはあった方がいいと思う。
Power consumption and cooling
This system consumes 6W when idle. It consumes 8W with high load and 4W when the display is off.
CPU temperature is around 40℃ when idle. It will become 60℃ when high load.
If I turn off the fan, it will become over 70℃. I think fun is needed for this system.
時系列
- 2020/05/13 思いつく。
- 2020/05/25 60mm版の印刷
- 2020/06/25 150mm版の印刷
- 2020/07/30 キーキャップを印刷
- 2020/08/10 必要な3Dプリントを完了
- 2020/08/21 配線完了
Timeline
- 2020/05/13 Got an idea.
- 2020/05/25 Print 60mm one.
- 2020/06/25 Print 150mm one.
- 2020/07/30 Print keycap.
- 2020/08/10 Print all 3d printed parts.
- 2020/08/21 Finish wiring.
材料代
- RaspberryPi4: 90ドル
- 5インチ液晶: 18ドル
- ProMicro: 3ドル
- 6センチファン: 2ドル
- ネジ穴つきUSB延長ケーブル: 2ドル
- その他配線用部品: 少々
- M3のねじとナット: 少々
BOM
- RaspberryPi4: 90 USD
- 5inch Display: 18 USD
- ProMicro: 3 USD
- 6cm Fan: 2 USD
- Mountable USB extension cable: 2 USD
- other cables: some
- M3 nut & bolt: some
作ってないもの
- ファミコンみたいなカセットを差せる
- プリンター内蔵
- バッテリー動作
- 加速度センサ
- アンテナ
- スピーカー
- 受話器
- 温度によるファンコントロール
Future work
- Cassette support (like NES)
- Internal printer
- Battery
- Inertial measurement unit
- Antenna
- Speaker
- Handset
- adaptive fan control
Quotes/評判
CYBERCUBE MAKES A GREAT COMPUTING COMPANION
We can’t wait to see the next iteration.
– Kristina Panos (Hackaday)
The Strange CubePC Is Like a Laptop, If You’ve Only Read Descriptions
We can’t imagine actually using this thing, but it is very impressive how unique the design is.
– Cameron Coward (hackster.io)
Киберкуб: создан новый необычный компьютер
– Виталий Лапиков (Hi-Tech Mail.ru News)
省スペースなのに物理キーボードが使える!!
— No Type Safe, No Life ! (@nogitsune413) August 23, 2020
PS.
この文章はこのPCで書いている。 I wrote this document with this machine.