We created a keyboard shapes like Japanese teacup.
湯呑み型のキーボードを作った。
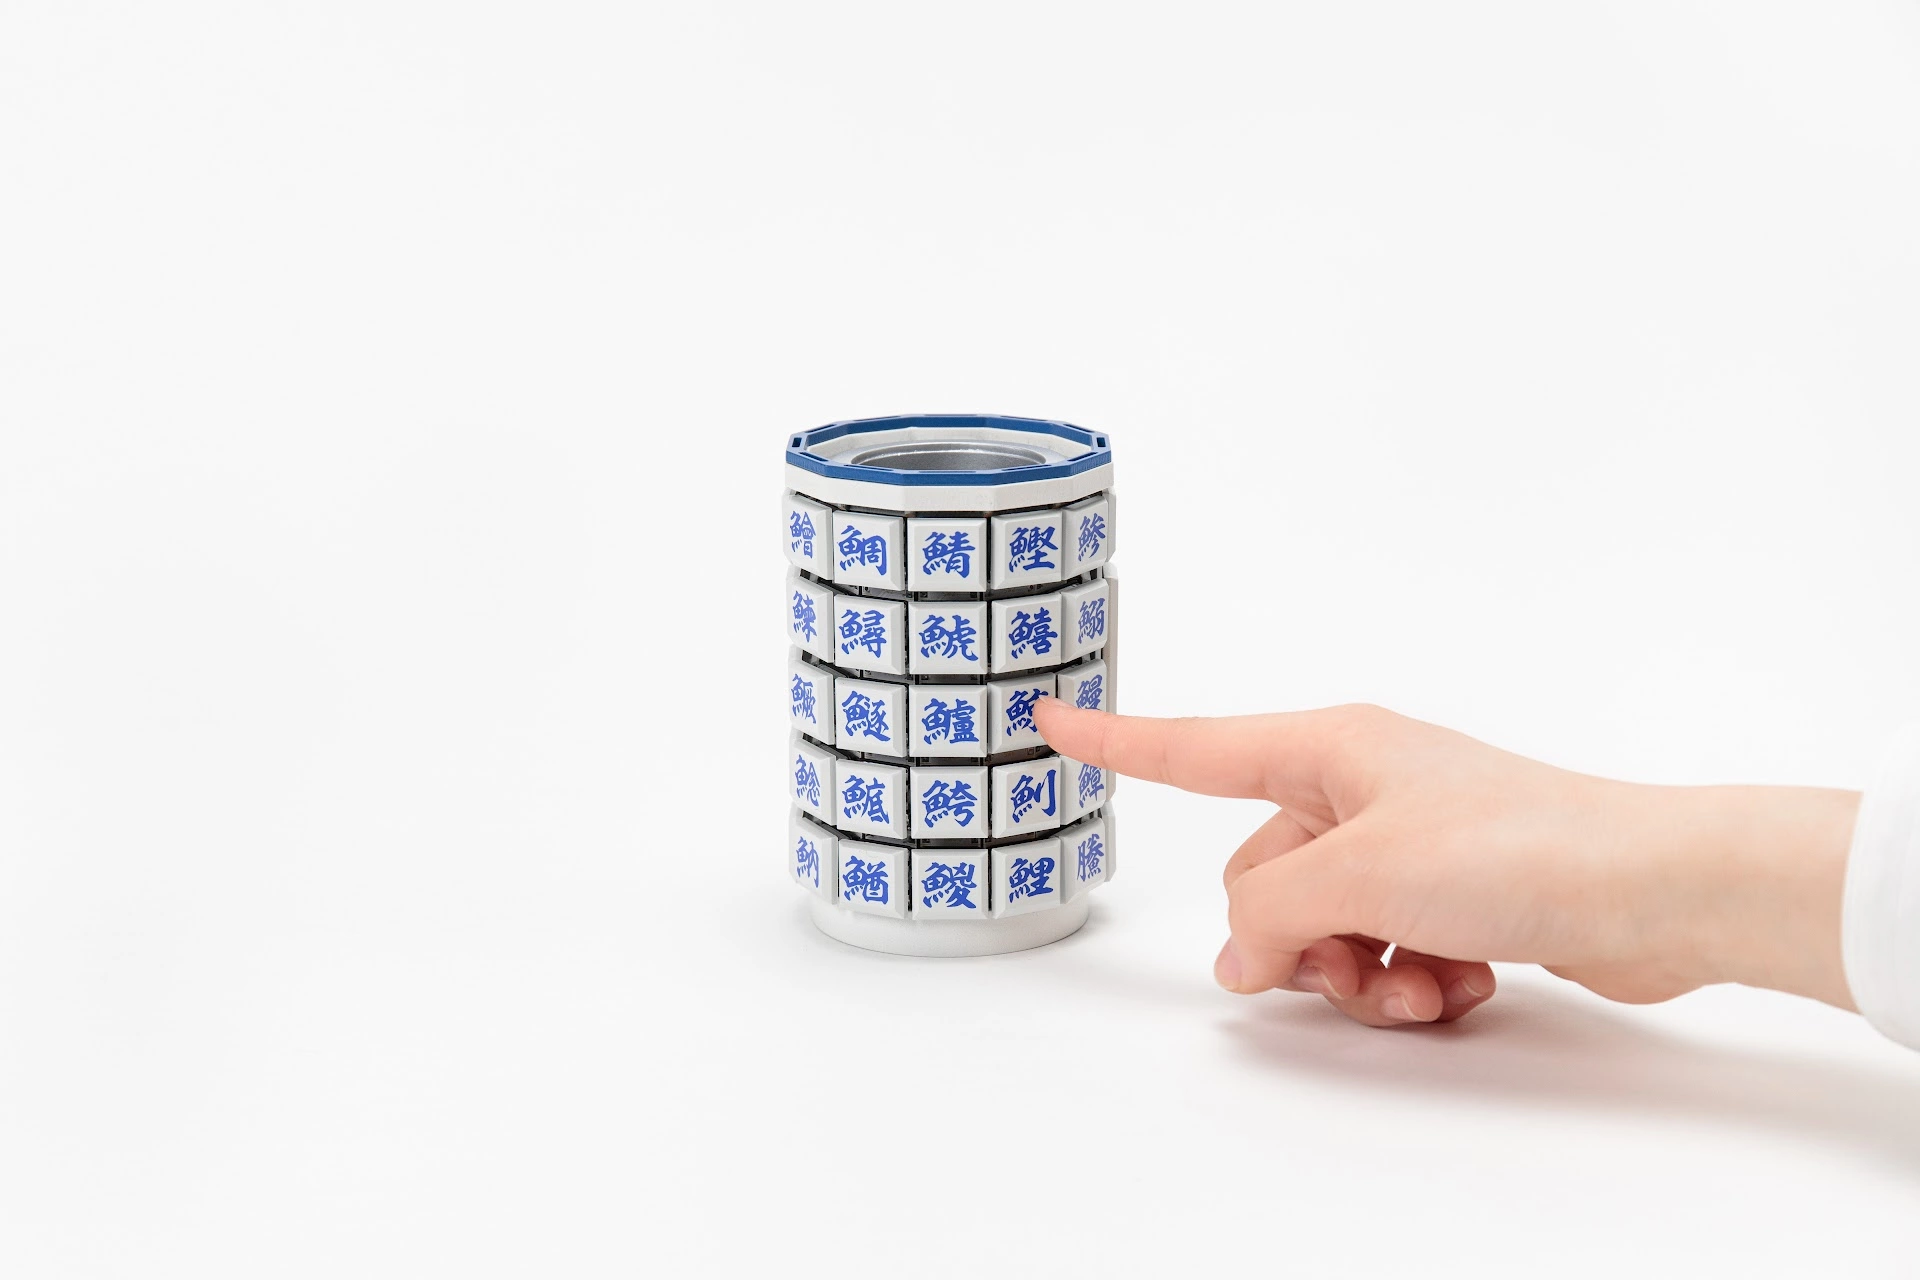
Shape
We call it as cup, but actually it shapes like cylinder of dodecagon.
We create 12 piece of rectangle key PCB and 1 dodecagon main PCB.
Each PCB was connected by wire and soldering.
Downside of the this method is difficult to soldering, but it’s good challenge and fun.
Circuit
Each key pcb has 5 keys.
One naive solution is connect all keys to main PCB. But shorter side of key PCB has too many connection.
To avoid this problem, I create circuit like spiral.
Each key PCB connected to main PCB by 2 wire. One is for row, one is for column.
This two wires are connected to bottom key. And the column to connect to second key of next key PCB. Also connected to third key of third PCB. And same for other column wire.
Each key PCB has exactly same circuit but it covered all key.
形
湯呑み型と言っているが、実際は円筒型ではなく、12角形の筒型になっている。
12枚の長方形のキー基板と、1枚の12角形のメイン基板でできている。 キー基板をつないで円筒系にして、端をメイン基板でフタをする形だ。
基板の間は針金と半田付けで組み立てられている。
これのマイナス点は、半田付けが大変な所だが、 いい具合の難易度で作った人には楽しんでもらえると思う。
回路
各キー基板には5つのキーが配置されている。
単純な回路だと、この5つのキーをメイン基板につなぐ方法が考えつくが、 キー基板の短い辺に何本も配線を通すのは面倒だ。
これを回避するためにスパイラル配線を採用した。
各キー基板は2本の線でメイン基板につながってる。 これを行と列と呼ぶ。
この行と列は、一番下のキーにそのまま繋っている。 その後、列配線は隣の基板の下から2番目のキーにつながっている。 更に、その隣の下から3番目のキーに繋っている。 このように隣の基板の1つ上のキーに繋がっている。
このように配線した事で全く同じ12枚の基板を使って、 全てのキーに配線をつなぐ事ができる。